For a mixing engineer, being able to work creatively but also quickly is very important. So organising your session and files early helps ensure that when it does get to the creative stuff, there’s nothing slowing you down.
Organising and cleaning up a session before you start mixing a song is by far the least interesting part of the job. Large track counts and poorly named files can test even the most patient mixing engineer. Unfortunately, the truth is, the decisions you make and the systems you put in place when setting up your sessions, can play a big role in how well you can work later in the process.
Here are some easy things you can do before you get stuck into mixing to make your life easier in the long run:
GET ORGANISED
Something simple like setting the track tempo means that you can quickly jump between sections of the song, or quickly layer drums and edit vocals with help from the grid. It can also assist in quickly identifying if something is out of time.
ARRANGE YOUR FILES
One of the best things to do as soon as you’ve imported your audio files is to group and arrange them. Grouping tracks by instrument type will help you keep track of what is in your session, and allow you to quickly find it when you are mixing.
Many times we are not fortunate enough to have been provided nicely named audio files either. Chances are you’ll probably get a few “audio 26” or “inst_83” files littered throughout the session, so it’s a good idea to go through, listen to and rename these accordingly. Producers take note – do this and your mixing engineer might just be your new best friend!
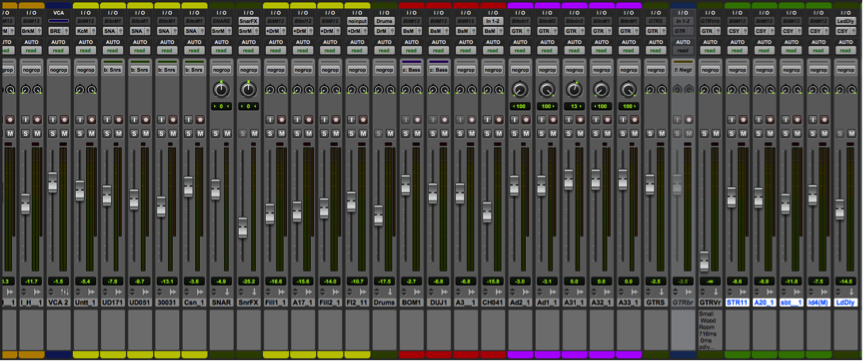
Colour coding your sessions is another great way to stay organised. Once you have a system going, navigating tracks by colour becomes second nature. It might be a bit of a pain to begin with, but once you get in the groove, this helps you quickly flick to the track you want to adjust.

All the colours of the rainbow: I use yellow for drums, red for bass, purple for guitars etc.
FREE UP CPU SPACE
As the job of the mixing engineer increasingly takes place “inside the box”, computers have become essential to the job. So when you’re mixing, there is always the risk of maxing out your CPU. Fortunately there are things you can do during set-up that can help. In Pro Tools (other DAW’s have similar features), you can use the Dynamic Plugin Processing option to significantly reduce the amount of CPU your plugins are using. Here is Avid’s explanation of what it does:
“When enabled, the Dynamic Plug-In Processing option maximizes plug-in counts by dynamically reallocating host-based processing resources as needed. This means that plug-ins only use CPU cycles when they are actually processing audio.”- Pro Tools Reference Guide
Effectively, if there is no audio on the track, then the plugin is ‘off’ and not using any resources. The process is explained in more detail here:
To get the most out of this feature, it is good to remove any parts of an audio file that don’t contain actual audio.
The best way to do this is with the Strip Silence tool. Using this, you can get Pro Tools to remove (non destructively) any part of an audio file below a certain threshold (see below). This means any plugin on that track will only use the CPU when there is actually audio playing.

Set the threshold, minimum duration of audio and start/end buffers of the audio track you want to remove the silence from.
GET YOUR I/O SORTED
Once you’re mixing, you want to be able to create new audio tracks or busses without worrying about accidentally using the wrong inputs. It is not uncommon to accidentally import I/O settings from another session, or for buss assignments to disappear. One way to avoid confusion is to reset your I/O settings when you are setting up a new session.
To do this in Pro Tools, go to Settings > I/O > Buss > Default.
ADD SOME SESSION MARKERS
Adding markers in your session makes finding specific sections of the song much easier. I usually mark clear sections, such as verses, choruses and bridges before I begin mixing. This way, if I want to jump to a section I can just click the marker and the play head will follow.
It can also be great for general automation, particularly if you want to give something a boost in the chorus or bring it down in the verse.
GET A BASIC BALANCE
Once you’ve got all the boring stuff organised, you’re ready to go. As. amixing engineer, balance is everything. So before you reach for an EQ or compressor, it’s a good idea to press play and get a basic balance first. This will help you quickly identify what is competing for space, where things should sit in the stereo field and what to build the mix around.
If you have any questions, are looking for a mixing engineer or just want to say hi, feel free to get in touch.

