Mixing engineer James Millar goes into detail about how he went about mixing Dan Keyes latest single, Don’t Hear Me.
A lot of the time, the main job of a mixing engineer is to make sure that every element of the song can be heard and has the impact intended by the producer. Intention and emotion are huge and should never be lost between the rough and final mix.
Given the amount of different layers and melodies that made up the bulk of this record, the mixing process was predominantly about creating space for each of these elements to sit together, without destroying the overall ‘blend’ that glues the song together.
The session has around about 70 audio files – including 9 drum tracks, 2 bass tracks, 6 guitar tracks and a then whole lot of synth, vocal and backing vocal tracks.
Here is a breakdown of my approach to each element of the song and my thought process as a mixing engineer:
DRUMS:
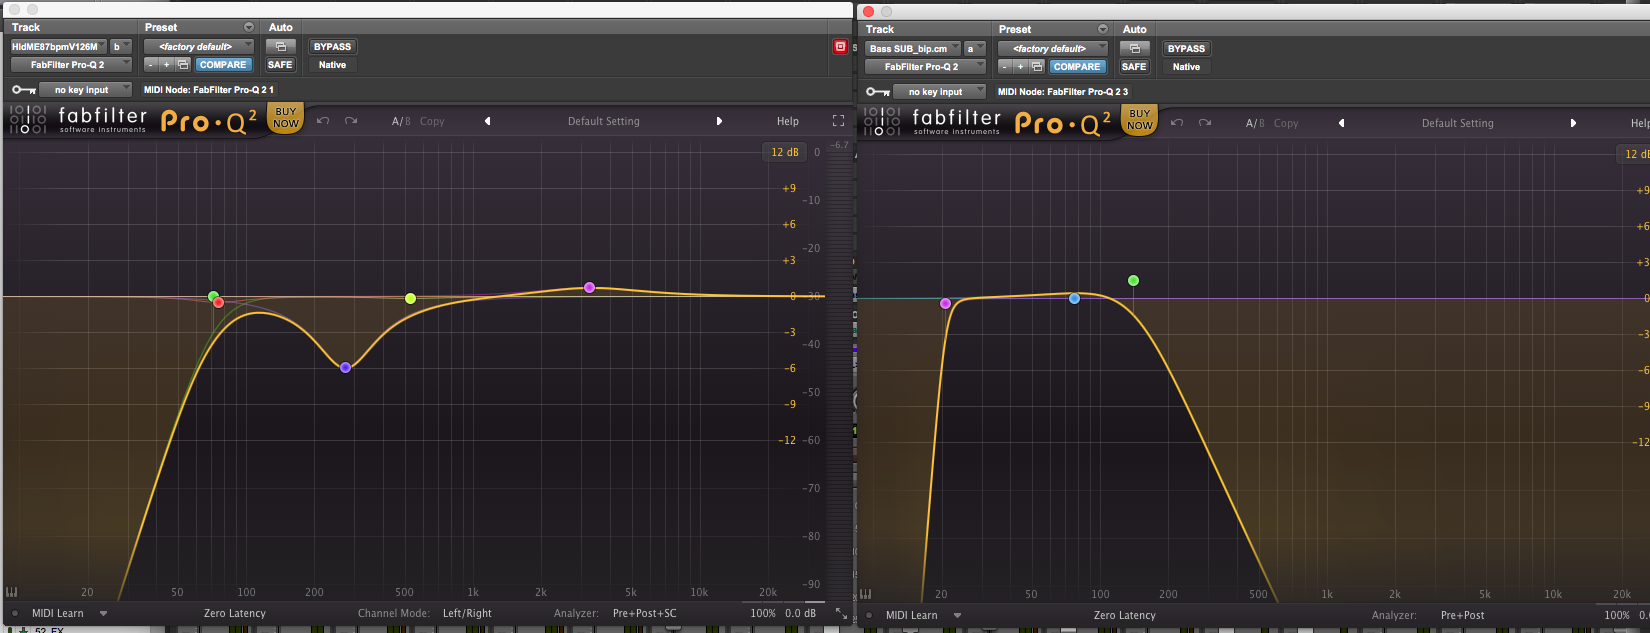
The drums needed to be quite powerful, and the kick and snare drum took most of this responsibility. For the kick – given there is a sub bass in the chorus – I filtered a lot of the low end out, instead focussing its power around the 110hz mark. It is then being compressed quite heavily through the dbx-160 to bring out more attack and punch.
On the main snare sound, the UAD SSL E Channel is doing most of the work. To add some extra bite and snap, I boosted around 7kHz and 2 kHz, and then balanced that out by adding some 200hz to bring out the ‘body’ of the drum.
The hats and cymbals sounded great already so it was just a matter of making sure they cut through the mix. I mostly used the Waves Aphex Vintage Exciter on a buss to add some extra sizzle to the sounds.
For some more tips on using the SSL E Channel to mix drums, here is a great video from mixing engineer Joe Chiccarelli:
BASS:
The main bass sound in this track is a sub bass that comes in during the chorus’.
So that the sub bass did not interfere with the kick drum, I used a pretty aggressive low-pass filter at around 140hz. So it then didn’t get lost in the mix, I added some growl by sending it to the UAD Precision Enhancer Hz and Soundtoys Decapitator on separate busses.
Harmonic distortion can be the best friend of a mixing engineer. I go into more detail about using harmonic distortion to get bass to cut through a mix in this article.

Creating space for each element – The kick EQ on the left and the Sub Bass EQ on the right
GUITARS:
The guitars in this track are mostly textural. Of the two main guitar lines, one punctuates the arpeggiators, and so the goal here was to blend these two together. I used mostly EQ and a little bit of distortion from the Decapitator to achieve this.
The second main guitar line I pushed out very wide to add some overall shimmer to the chorus. These guitars already had a nice reverb on them, so there wasn’t a whole lot that needed doing. This is an important point. You don’t have to treat every track. The mixing engineer should do no harm!
SYNTHS:
There are two main types of synths in this record: the arpeggiators, and the pads.
The arpeggiators are the main driving force throughout the song and are made up of a blend of 4 different sounds. I treated each sound individually first, using mostly EQ to carve out room for each to blend together into one cohesive “arp sound”.
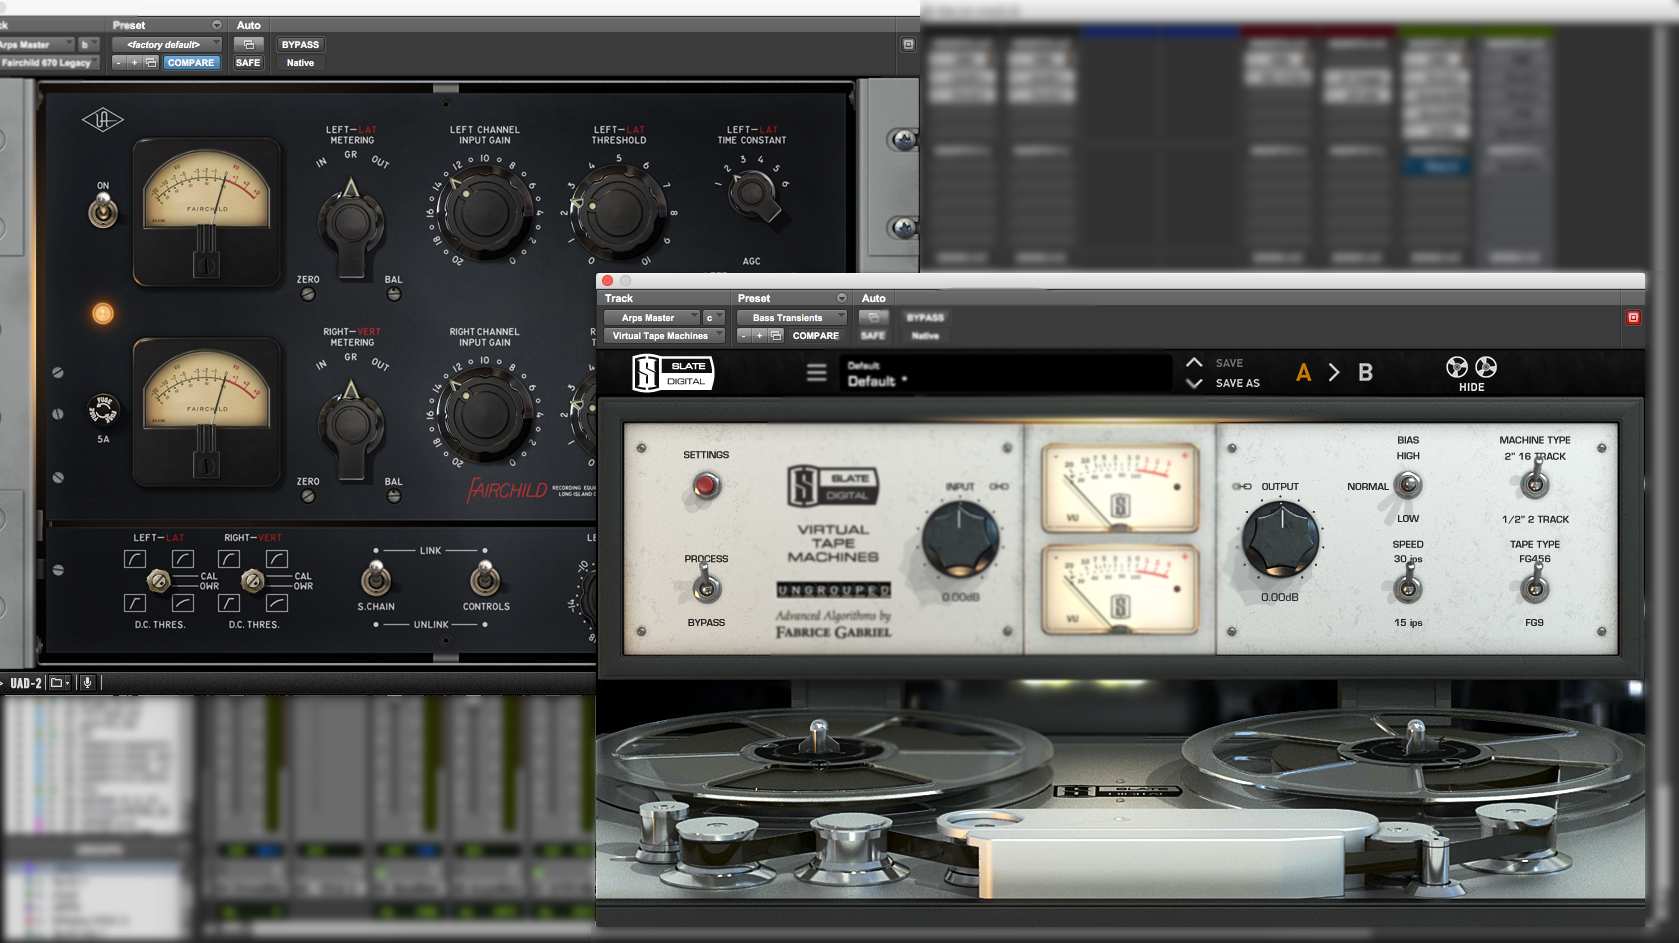
On the highest line, given there was already quite a bit of information in the top end from the other arp tracks, I used a touch of plate reverb to give it its own space. The full blend then went through the UAD Fairchild 670 and Slate Virtual Tape Machine (VTM) to smooth things out.

The final step of the process for treating the arpeggiators.
The pads I treated more atmospherically. There is quite a lot of EQ on the pads to make room for the other elements in the song. I also used a multiband compressor on a few of the sounds that is being triggered by other tracks – mostly by the vocal so it can sit nice and clearly on top of everything else.
LEAD VOCAL:
As a mixing engineer, you have to get the vocal right. The lead vocal was just one track, and fortunately sounded pretty good to begin with. For the initial treatment, I used the UAD SSL E channel to add some air and body, and then added some saturation using Slate VTM.
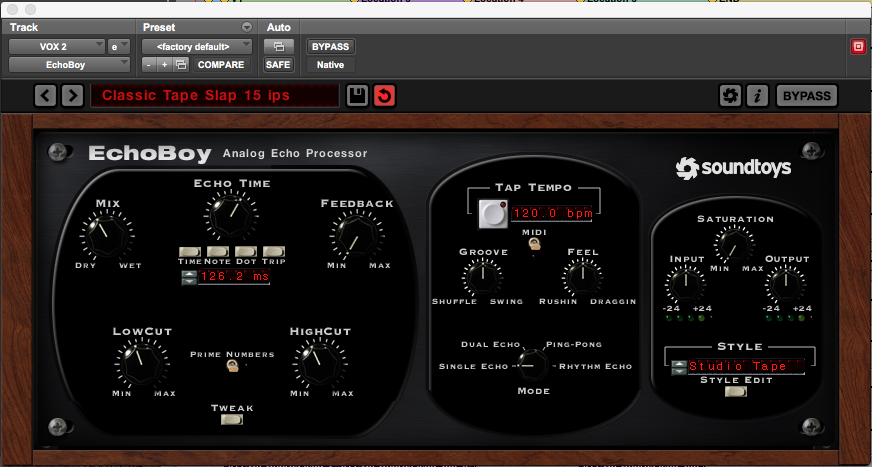
Given there were so many synths in the track, I didn’t want to add any reverb to the vocal, so the effects are mostly a combination of different delays. I used the Echoboy tape slap delay to create some ‘space’, a stereo slap to add some width and then an 8th note delay (that is being automated throughout the song) to fill in the gaps.

The main vocal effect was this classic slap delay on the Echoboy
BACKING VOCALS:
When I first started out as a mixing engineer, I found backing vocals quite difficult. So getting this part right was important, as there were quite a few backing vocals to work with in this song. Once I got a good balance between the different voices, I used the UAD 1176LN to glue them all together.
The tricky part of mixing the backing vocals was getting them nice and big, without muddying up the rest of the arrangement. To do this, I used a mixture of reverb and delay, each of which was being quite heavily EQ’d. I used a hall reverb from Slate Verbsuite Classics with the width parameter turned almost all the way up. I also mixed in the slap delay from the Waves CLA Vocals to open things up a bit more.
Overall, this was a tricky track to mix given how many synth elements there were to work with, but it was also very rewarding. Once the blends started to come together, things started to click and everything fell into place.
If are looking for a mixing engineer to work on your next record, or have any questions about any of the techniques mentioned above, please get in contact.

